
86 Bumper Tab Install
First of all, thanks for your purchase!There are a number of ways that these bumper reinforcement tabs can be installed;
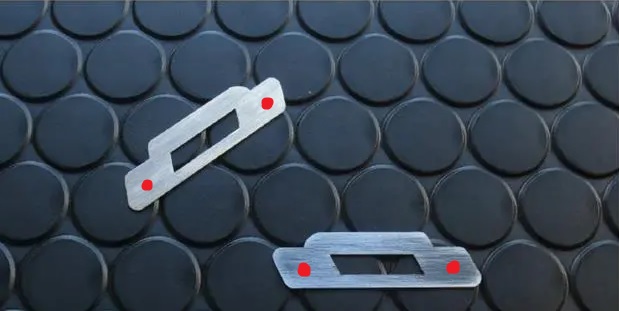
The 2 most popular installation methods are to either glue the tabs on with an epoxy style glue, or drill small holes into the provided tabs and bumper, then rivet or bolt them into place. ( Drill locations shown below in RED )
However in these instructions I will cover the glued in place method.
1) Remove bumper from vehicle, or loosen sides enough to gain ample access to the broken or affected bumper tabs
2) Sand the UNDERSIDE of plastic bumper tabs with 60-80 grit sandpaper to achieve a rough sanded surface to prepare for a good mechanical bond. ( Sanding stainless tabs to a rough finish is also a good idea )

3) Pick your glue of choice, ( Some flex when dry is ideal ) Most commonly used glues for install are E6000 or JB Weld Plastic Bonder
E6000 Adhesive on AMAZON

JB Weld Plastic Bonder on AMAZON

4) Apply glue to prepped bumper surface and spread with brush or finger. Use spring clamps, such as binder clips, clothes pins etc to hold metal tab in line with affected bumper tab. ( You only have one shot, so make sure it's right ) Make sure to clean excess glue squeeze out from area.

5) Allow adhesive to dry per manufacturers recommendations. Once dry, remove spring clamps, clean anymore excess glue and check out your new reinforced bumper tabs!

6) Reinstall bumper
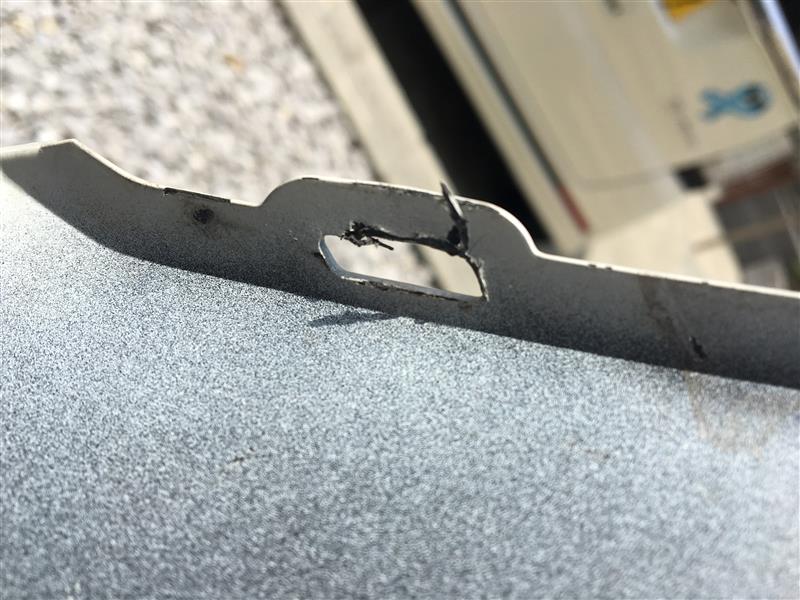
Before
 After
After
Disclaimer:
This reinforcement clip is not guarenteed to fix all bumper sagging issues. There are multiple defects that can cause the bumper to fit incorrectly. This tab will not fix broken or damaged clips on your headlight / fender bracket or other recieving tabs. This tab WILL however reinforce the pre-existing flimsy oem bumper tab and provide strength to keep the bumper in place on a good condition fender bracket. Thanks for understanding